My digital workflow and method to manage and organize pictures in Adobe Lightroom
In this tutorial I will explain how I organize my photographs and manage the different files of my creative photography workflow. I work with Adobe Lightroom and Adobe Photoshop. But even if you don’t work with the Adobe Softwares, the ideas and philosophy behind the system that I use, can still be a valuable and solid basis for a good management system applicable by all beginners and experienced professionals.
Why do we need a good system to organize our photographs?
We live in the digital age where almost every household or every person owns a digital camera or a mobile phone with a camera.
We take pictures, almost every day, and very often we just leave them on our cameras or mobile devices until we want to use them – to share a with our their friends and family.
After a couple of years, we have made thousands of pictures and let’s face it, most people do not even bother organizing pictures. But after a while storage becomes a problem and either we delete our pictures or we save them somewhere on a harddrive, without any thought about structure or folder naming. Most people don’t have a logic system for organizing and storing their pictures. This often means that many pictures are hard to find, they even get lost and memories are gone forever.
That is why it is desirable for people to maintain a simple system to organize their pictures and videos. For amateur and pro photographers it is an absolute must to have a well thought-out system.
So, what should you do to keep your pictures organized and save? A small effort to organize and structure your pictures is enough to make sure your valuable pictures are safe and easy to retrieve.
I believe I have a good and easy to implement method that can be used by amateur photographers and creative professionals. And I am happy to share it with you.
How do you start?
With strategy first!
Before you take any action, I want you to take a couple of minutes and think about your strategy first. Here are the three most important questions you need to answer before you start :
- How do you want to organize your pictures (structure, naming, date, tools)?
- Where do you want to store your pictures?
- How do you plan to make backups of your files?
I believe it is essential to think about these questions. The method to organize and manage your pictures will clearly be influenced by the reasons why you take pictures or the creative purpose of your photographs.
How many pictures do you have to organize and how many storage do they require now and in the (near) future?
How do you want to protect your digital files against loss or destruction? Think about how you felt the last time your hard drive crashed and you didn’t have a backup. All these precious files are lost for ever.
Now let me show you, how I have structured and organised my photography files.
Organizing and structuring pictures
In my experience, it is still the best practice to organize all of your photographs by date.
And to add more meaning to the folder names and picture names, I prefer to add an event description.
I have done this when I started to create my folder structure and when I am renaming my pictures.
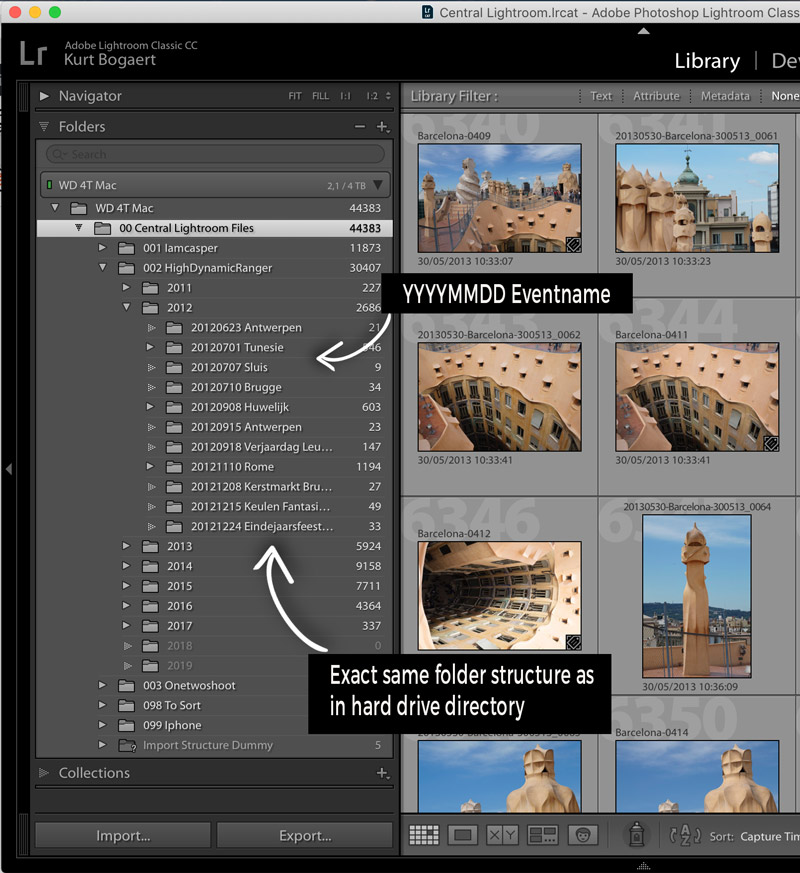
My picture folder structure looks like this :
When I started to use this system, I have also renamed the pictures in the same way.
A meaningful picture name will allow me to easily know when the picture was taken and what it is about.
When you have to rename multiple files, you can use “batch renaming”.
Batch Renaming files can easily be done in Adobe Bridge, or in Adobe Lightroom when importing the pictures or you can even batch rename multiple files in windows and in OS. I will show this in the video or you can search how to batch renaming files in Google search. There are different options to do this.
Now that we have determined the folder structure for storing the pictures and we are using meaningful filenames, we can easily retrieve our precious photographs. Now let’s take a look on how I manage and organize all of my photographs in Adobe Lightroom.
Where do I store my organized pictures?
The hard drive storage capacity, that you need to store all of your pictures and creative files on, depends of course on the number of files you have. I can’t predict that for you.
Me personally, I don’t store picture files or creative files on my computer’s or laptop’s harddrive. The internal hard drive of my laptop just doesn’t have enough capacity. I prefer to keep all of my picture files stored in one place, on an external hard drive, organized in the folder structure that I described in earlier paragraphs.
Having all of my pictures in one place, make it easier to find my pictures. The photos aren’t spread across multiple drives, so I don’t have to remember what photos are on which drive, or start to label things and worry, and so on. Having all my files in one place, makes it easier to make a backup too.
At this moment I have a 4TB External Hard Drive on my desk that stores all my RAW photography files, for my different projects, businesses and private family life, that I want to keep under the folder name “Central LightRoom Files”.
Next I have a smaller 2TB portable Hard Drive that stores the Lightroom Catalog of the Central Lightroom Files and that stores also all of my creative files for the different businesses and projects that I run.
The first step you need to take
The first step is to determine how many storage room all your pictures and creative files together all represent in GygaBytes or TeraBytes. Make a list of all your the photography files that are scattered around across a variety of hard drives and assess the total storage requirement you need if you want to get all these files in one location, on one external hard drive.
Then you can decide what hardware you require to store your different files. When you have to buy a new external hard drive, consider buying a larger one than just for the capacity you need for the files you have right now (unless you will stop taking pictures from now on…).
Now that you have the requirement in storage capacity covered, it is time to get your data (your photography files) organized. Make a directory folder structure as demonstrated in the previous paragraph, organised by Year (YYYY) Month (MM) Day (DD) and Eventname. Batch rename the picture files and place all the related picture files in the corresponding folders.
When you have done this, you have set the basis for a stress-free photography file management system. If you are planning to use Lightroom, you just made a perfect basis for creating your Lightroom Catalog too.
Using Adobe Lightroom to manage my photographs
Now let me show you what I use Adobe Lightroom for (I will use the abbreviation LR for Lightroom from now on).
For those who don’t know the LR software, it is basically an image organization and image manipulation software developed by Adobe Systems for Windows and macOS.
Lightroom allows viewing, organizing and editing large numbers of digital images. To manage and operate on photography files they need to be imported into its database first. Once in the database, LR allows to make certain adjustments to the pictures. The most powerful benefit of LR is that the edits done in LR are non-destructive.
Why do I use Lightroom?
I prefer to use Adobe Photoshop for my image editing and Adobe Premiere for my video editing. So I use these Adobe products often and I think there is a good integration amongst the Adobe products. And Lightroom is not only good for organizing photos, but it is also good for processing photos.
When you have created a new organised directory structure with your renamed photography files in it, then it is time to create a new Lightroom catalog and import all your pictures in Lightroom.
Initial import of all photography files of the base directory structure
To make the initial import of all the photography files, that I have regrouped and stored in the new directory structure, I need to start LR and create a new catalog.
A LR catalog keeps track of the location and changes to the pictures in the catalog.
After creating a new catalog, clicking “Import”, select the topfolder in the folder structure and select “include subfolders” to have the complete directory imported. And start the Import.
When LR imports pictures in the catalog, it imports the location and metadata about the picture file and it will also make a low-res JPEG preview file from the full picture as it is imported. These previews are stored together with the catalog and thus will allow you to watch and even edit pictures, when you have only access to the catalog. For example when you are traveling with the catalog on a portable drive.
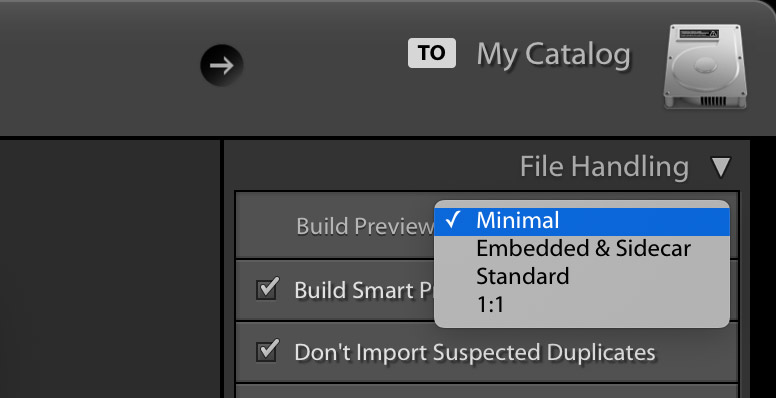
Now, when you are importing photos in Lightroom, you can choose the quality of the preview you want LR to store together with the catalog. Note that this decision will have a large impact on the time required to import photos but may save you significant time while editing.
I usually take “minimal” and later after culling and after making a selection of the best pictures, I rebuild the previews of the best pictures in a higher quality (standard or 1:1) that allows me to zoom in quicker and see more details. You have the option to rebuild the previews of selected pictures at any time.
As I mentioned before, I have my pictures stored on a desktop-type external 4TB hard drive, but the LR catalog itself is stored on a portable 2TB hard drive, to gather with my creative files (such as Photoshop, webpage pictures,…).
This allows me to have access at any given moment to my catalog and the previews, even when I am not sitting at my desk.
Now that the initial import of the pictures is done, It is important to realise that LR only knows about certain activities (e.g. deletes and moves) in your folder directory when you execute these actions in LR itself. So make it a habit to manage your pictures from now on via Lightroom.
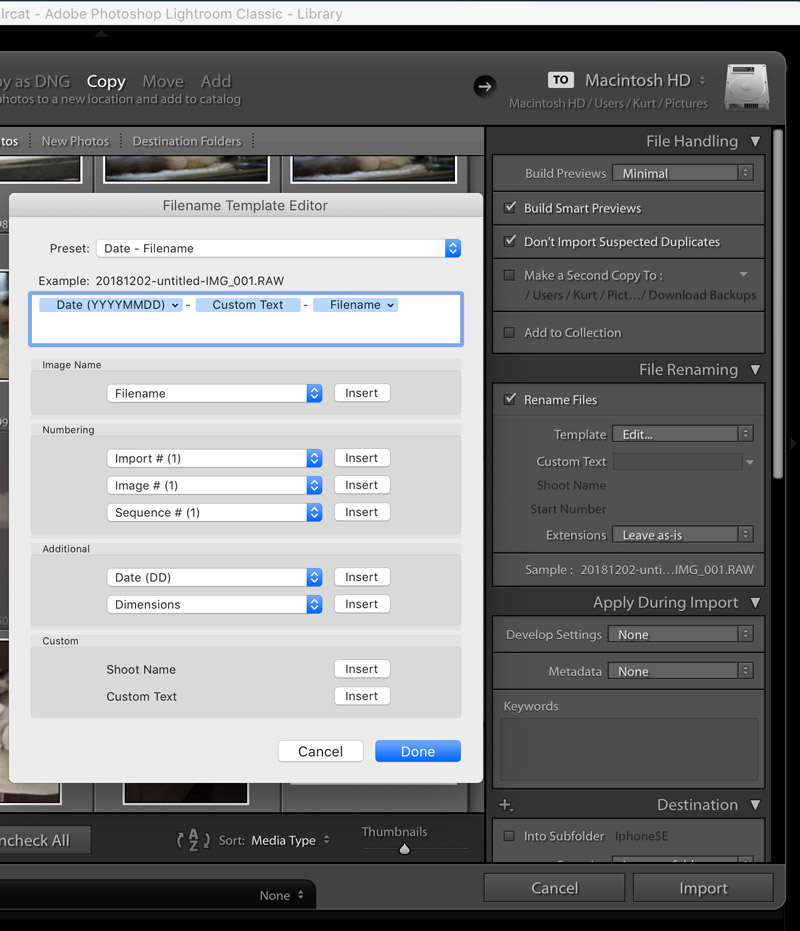
As you will explore the features of LR, it is also important to note, that LR has a file renaming option you can apply when importing new files. You can create a preset (YYYYMMDD event name) for renaming files, that you can select each time you make new imports of photographs through “Copy” (For example copying the files from a camera SD card).
Next crucial step : Culling and rating of the imported photographs
Now that we have proper and good system for structuring and importing our photography files in Lightroom, it is now time to explain my next steps in my workflow in Lightroom: Culling and rating of pictures.
There are basically three tools Lightroom offers to make differentiations among your photographs : flagging, star-rating and color-coding.
My basic culling and rating method goes as follows:
After importing pictures, or at a later moment in time, I go through the pictures and :
- Reject-flag (X on keyboard – to set reject flag and U to undo the reject-flag) the bad ones, that will get deleted
- give a 2 star (2 on keyboard) rating to the ones I think are good or beautiful enough to do something with later
This is an important step to make. Because if you keep all of the pictures we will take, and we do take so much every day, your hard drives will get filled with thousand of bad pictures that we will never use.
I reject all the technical bad pictures (e.g. blurred unsharp pictures) unless there is an strong emotional reason to keep it anyway. I give two stars to these pictures that I really like and stand out of the others.
This proces can go quite quick by using the keyboard arrows and the fingers at the X and 2 buttons.
After you have done a series of photographs, you can select (filter) all the pictures flagged as ‘Rejected’ and delete them form the catalog and also from the hard drive.
Remember that for physically deleting them from the hard drive you have to be connected physically to the hard drive that stores the picture files.
Suggestions, comments or questions?
Please let me know below.


