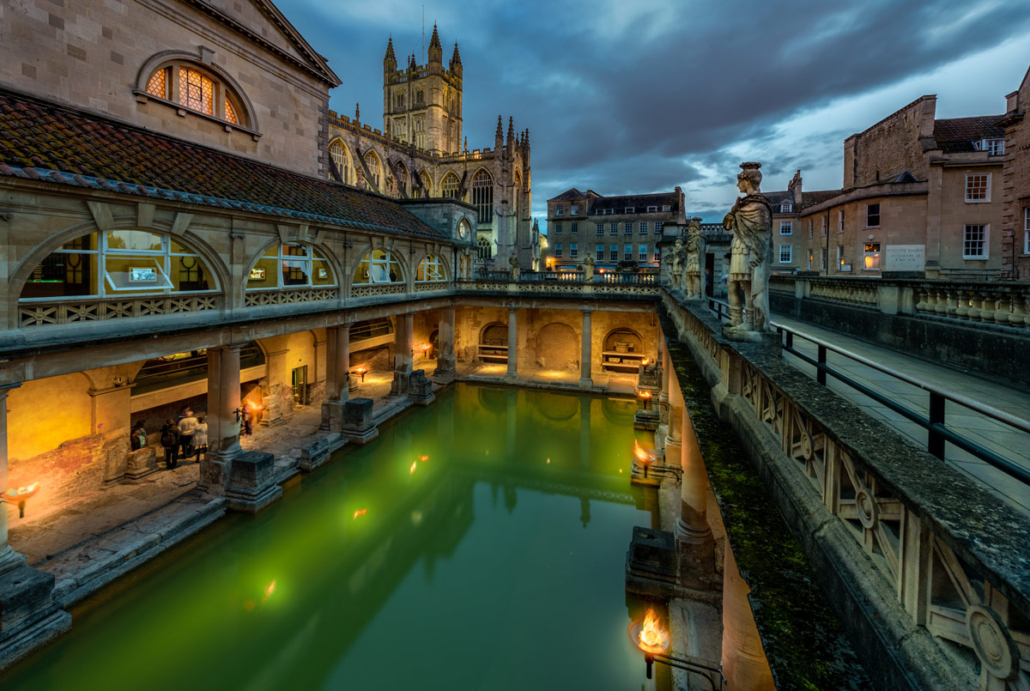
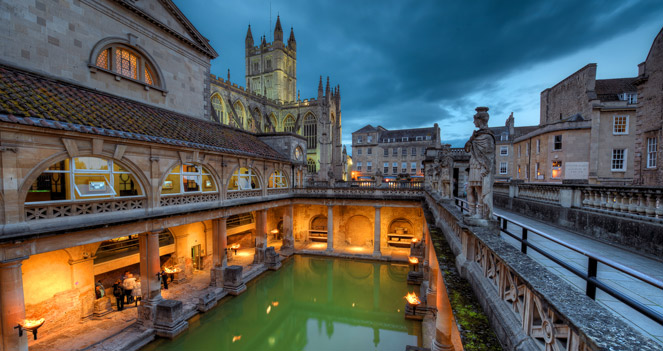
In september 2016 we were visiting the southern part of England (UK). I shot a sequence of several bracketed exposure photographs on my tripod, capturing the interior of the roman baths and the cathedral in the background. I initially created a HDR photograph out of five bracketed shots, post-processed with Photomatix and Photoshop. But today, I have reprocessed this picture because taste evolves overtime. The initial post-processed picture’s white-balance was a bit off and that is why I thought it would be good to reprocess this image.
I have sold the previous version a couple of times already on 500px, so I guess the image as such is attractive. I really like the colours of the picture very much. So I hope this may do even better.
The Roman Baths complex is a site of historical interest in the English city of Bath. The house is a well-preserved Roman site for public bathing and surely deserves a visit.
https://www.highdynamicranger.com/wp-content/uploads/2020/08/Icons-on-one-line_orange_mobile.png00Ranger Kurthttps://www.highdynamicranger.com/wp-content/uploads/2020/08/Icons-on-one-line_orange_mobile.pngRanger Kurt2020-08-30 12:45:192020-08-30 20:53:44Photo of the Day – Roman Baths in Bath – Reprocessed
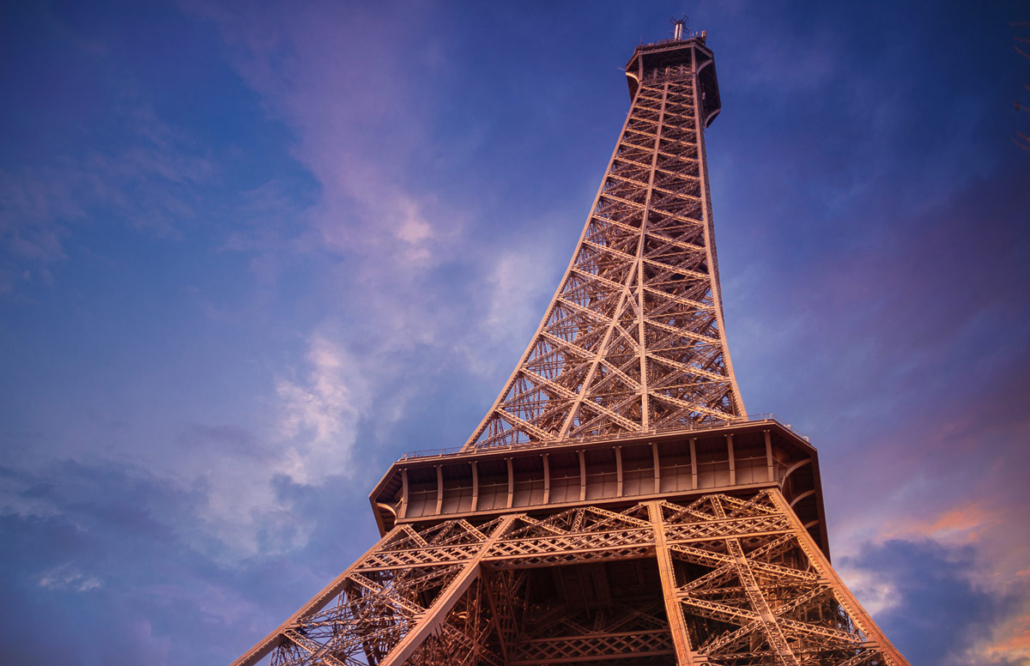
A couple of days ago, someone asked me if it was still possible to shoot a unique picture of the Eiffel tower. This monument has been photographed a couple of billion times by now, from all angles and distances, so indeed, it is hard to make a unique picture of this magnificent piece of archtitecture.
Nevertheless, although the angle may not be that unique, I still like this image because of the nice colourful sky, combined with the construction.
Paris is absolutely one of my favourite cities. Next time I will try to find a more unique angle.
This image is created by adding a colourful sky behind the tower. The initial image was shot on a flat grey day. Composition is done in Photoshop with colour-adjustment done in lightroom.
The final result is this colourful picture of the eifel tower.
What is your favourite spot, building or landmark for photographing in Paris?
https://www.highdynamicranger.com/wp-content/uploads/2020/08/Icons-on-one-line_orange_mobile.png00Ranger Kurthttps://www.highdynamicranger.com/wp-content/uploads/2020/08/Icons-on-one-line_orange_mobile.pngRanger Kurt2020-08-29 14:20:482020-08-30 16:03:21Photo of the Day – Colourful sky above Eiffel Tower in Paris
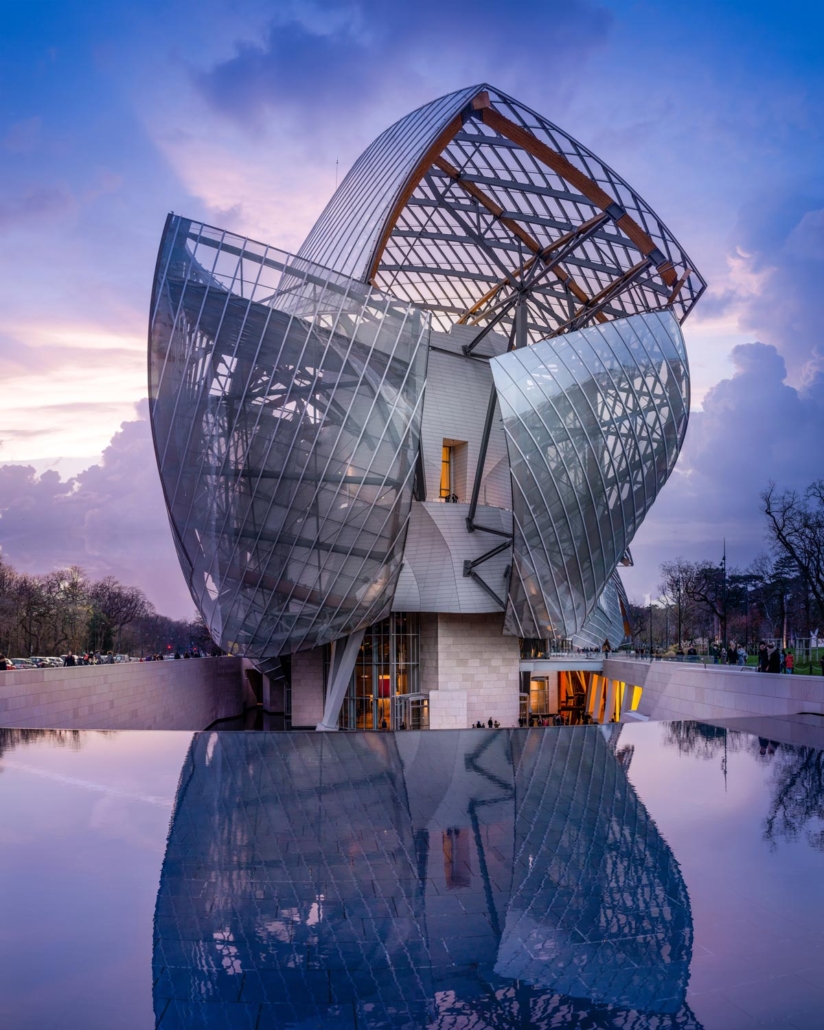
https://www.highdynamicranger.com/wp-content/uploads/2020/08/Icons-on-one-line_orange_mobile.png00Ranger Kurthttps://www.highdynamicranger.com/wp-content/uploads/2020/08/Icons-on-one-line_orange_mobile.pngRanger Kurt2020-08-26 20:34:362020-08-30 16:10:02Photo of the Day – Louis Vuitton Foundation Building in Paris
London is an endless source and inspiration for new creative compositions for photographs.
One of the most known of the many magnificent landmarks in London is of course The Shard. I took this photograph a couple of years ago when visiting london with my wife.
Shot of the shard at the end of More london Riverside, from the scoop at city hall. The shard (in the distance) is a magnificent building that is really marking the skyline of London. I absolutely need to go back for a re-shoot and get some more pictures of this great piece of architecture.
Processing done in Lightroom and Photoshop.
What is your favourite spot, building or landmark for photographing in London?
https://www.highdynamicranger.com/wp-content/uploads/2020/08/Icons-on-one-line_orange_mobile.png00Ranger Kurthttps://www.highdynamicranger.com/wp-content/uploads/2020/08/Icons-on-one-line_orange_mobile.pngRanger Kurt2020-08-26 19:51:532020-08-30 16:27:21Photo of the Day – Exploring More London Riverside
In the latest versions of Adobe Lightroom and Photoshop it has become very easy to create a HDR picture from different images shot with different exposures (HDR Bracketing).
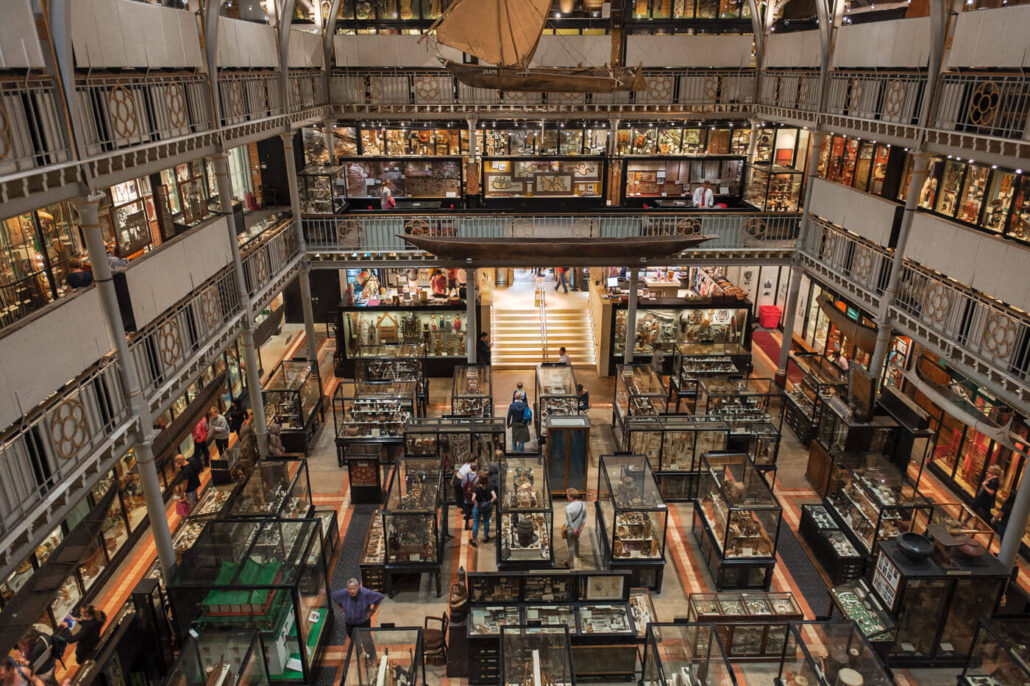
I will use 5 images I’ve shot a couple of years ago in the National Museum of History in Oxford with HDR Bracketing. If you want to learn how to take the images with the different exposures, take a look at our tutorial about HDR Bracketing.
Let me start by showing the result of the processing.
In this post and video, I will show you the easy steps to take to create a HDR picture in Photoshop. You can watch the video, or read the text, or both…
Here are the different steps:
Select your images with a different exposure from lightroom ( I usually take 5 images going from -2 ev to + 2 ev.
Select the 5 images, and in the develop mode, in the tab lens correction, I select “Remove Chromatic Abberation” and “Enable profile corrections”.
I go back to the library mode and with the five picture selected, I right-click one of the pictures.
Now I can select Photo Merge, HDR … but I won’t select that because that is the HDR action of Lightroom and this video will show how to do it in Photoshop. So I click, Select “Edit in -> Merge to HDR pro in Photoshop”.
Photoshop will open up and start importing the 5 images from lightroom. Once imported Photoshop will align the image
A new screen will open and then this screen where you can set the white point (I usually set it to not blow out brightest part of the picture) and select remove ghosts (in this image some people were moving in between shots, so to remove that motion blur, I will select remove ghosts). The picture with the green rectangle will be used as a basis.
Next click OK and Photoshop will create the HDR. Once the processing finished, just save and close the picture. After saving the picture will appear in Adobe Lightroom, where you can adjust the picture to your liking.
Next step is to export the image and you have a beautiful HDR image.
I hope this was helpful to you, let me know in the comment and don’t forget to subscribe for more videos.
https://www.highdynamicranger.com/wp-content/uploads/2020/08/20160802-Oxford-Museum-National-History_HDR-feature.jpg5321400Ranger Kurthttps://www.highdynamicranger.com/wp-content/uploads/2020/08/Icons-on-one-line_orange_mobile.pngRanger Kurt2020-08-14 21:11:262020-08-31 19:21:54How to make a HDR picture with photoshop in one minute
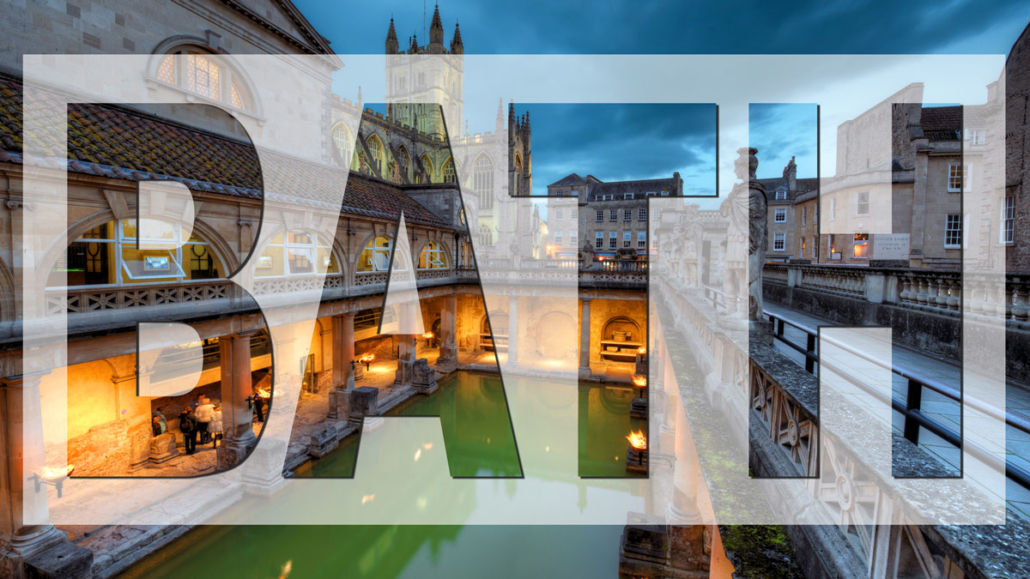
In this blogpost and video, I will show you how to do a text effect over an image, like on the pictures below.
I have created a video tutorial to show you about placing transparent text on an image in Photoshop. When we place text on an image, and the text is difficult to read, readers may get forced to choose between straining their eyes and skipping over the content. Rather than risking that users ignore your text, you can implement small changes to the design to increase the contrast between the text and the background. So let me show you how to do this in photoshop in the video below:
If you prefer to read rather instead of watching the video, here are the different steps to take to create this transparent effect.
In Photoshop, we start by opening a new project, Select and add a background picture Or we start by opening an existing picture (here I will use an HDR picture)
Next, New layer, Fill that layer with white, Set the transparency to around 60-70
Next step is to add the text we want to put on top of the image, I select the text too and start typing your message, the text that goes on the picture.
We color the text black, and put in central in the frame with Ctrl-A, selecting align vertical and horizontal to the center, Ctrl-D to deselect
Next step is to group the text layer with the white layer, we cam hit Ctrl-G or Cmd G on a mac, or use the menu Layer, group layers
In the group we select the text layer and open the blending options by right-clicking. We are going to knockout the text by selecting shallow and we set the fill opacity to our liking, around 25-50%
The get more readablitity of the text and still remain a good view of the picture there are several options
Blur out the background a bit (with directional blur)
Make the white rectangle layer smaller so you can still see the image clearly, and read the text at the same time
Add a drop shadow to the text
Always pay attention, when you overlay text on an image, because you are sacrificing two things: Image clarity – Text readability
For example the picture of the parliament in Budapest, placing text on less complex areas of a photo will typically improve the readability, like we did with the picture here. Putting the text on the water, keeps the subject of the image, the building is still visible.
Adding a drop shadow or stroke effect to your text will help increase readability in photos with more complexity.
Try to play around with the text design and see what combination works best for your chosen image.
Good luck!
https://www.highdynamicranger.com/wp-content/uploads/2018/10/How-to-create-transparent-text-over-image-in-photoshop.jpg5321400Ranger Kurthttps://www.highdynamicranger.com/wp-content/uploads/2020/08/Icons-on-one-line_orange_mobile.pngRanger Kurt2018-10-02 16:45:072020-08-31 20:00:42How To Create Transparent Text Effect on an Image – Photoshop Tutorial
In september 2016 we were visiting the southern part of England (UK). I shot a sequence of several bracketed exposure photographs on my tripod, capturing the interior of the roman baths and the cathedral in the background. This HDR photograph is a picture created out of five bracketed shots, post-processed with Photomatix and Photoshop.
The Roman Baths complex is a site of historical interest in the English city of Bath. The house is a well-preserved Roman site for public bathing.
Bath was founded upon natural hot springs with the steaming water playing a key role throughout its history. Lying in the heart of the city the Roman Baths were constructed around 70 AD as a grand bathing and socialising complex. It is now one of the best preserved Roman remains in the world.
Some evenings the Roman bath is lit with fires, just like in Roman times. That night it was windy and rainy, but still an ideal moment for a great shot with the lit cathedral in the background.
If you want to learn more about how I make theses kind of photographs, a good place to start is to take a look at my Free HDR Tutorial. It explains my process and is an easy to follow step by step guide.
I’d love to hear what you think about this photograph! Please let me know if you have any questions or comments.
https://www.highdynamicranger.com/wp-content/uploads/2020/08/Icons-on-one-line_orange_mobile.png00Ranger Kurthttps://www.highdynamicranger.com/wp-content/uploads/2020/08/Icons-on-one-line_orange_mobile.pngRanger Kurt2016-09-22 16:45:482020-08-30 19:35:58HDR Photography – Roman baths in Bath